Pages

Tuesday, January 17, 2012

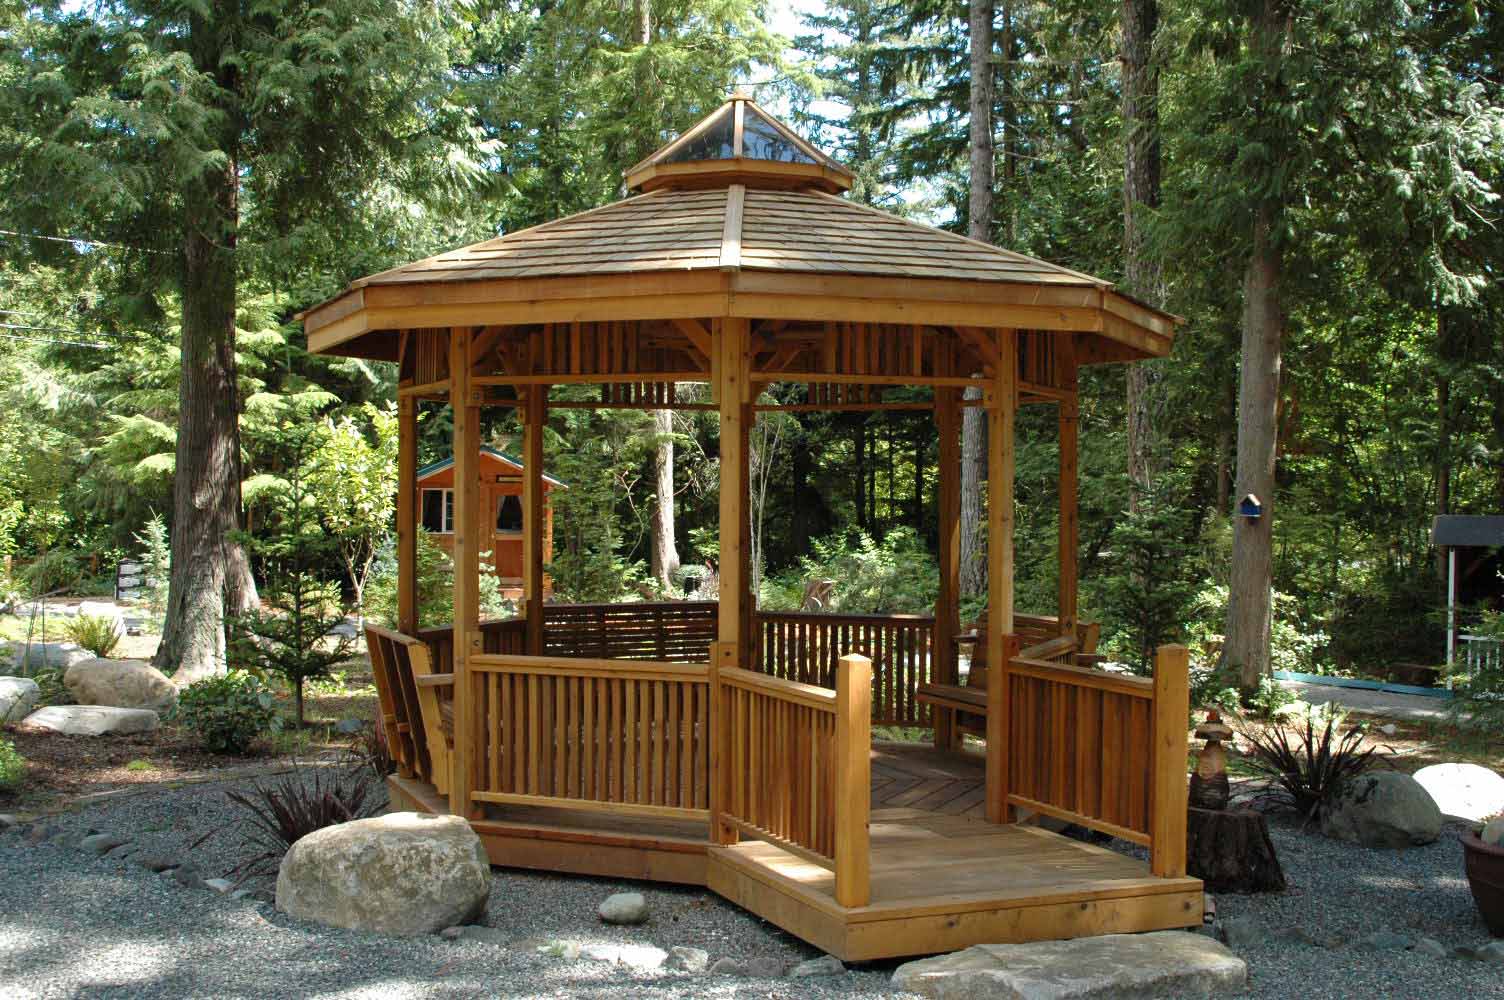
How to Create a Comfortable Gazebo at Home


Gazebo is an existing building in the park, usually on each side open because according to its primary purpose, the gazebo is a great place to enjoy the park. With an open hand, you are on the inside can enjoy the garden views more freely also can enjoy an unobstructed air to blow the cover on each side.

The atmosphere of hanging out with friends or family can feel more familiar in the gazebo. Some families also like to spend time in the gazebo while enjoying the garden to teach children. Atmosphere for learning is no longer a scary atmosphere for children, by contrast can make a child happy to learn.

To get a comfortable gazebo, there are several things to consider include the following:

Size of Gazebo
The ideal size for building a gazebo is at least 2 x 2 meters. Because the gazebo will be a place to congregate, it takes a room large enough so that those at the gazebo can enjoy freedom without having to shortage of places to indulge.

Size comparison with garden gazebo
Wide gazebo that must be met for comfort, the gazebo does not fit on a small garden. Comparison of the fitting remedy gazebo is the fifth of the area of ​​the park. Thus, the beauty of the garden can be more exposed and can be enjoyed from the gazebo.

Location / position Gazebo
Gazebo can be located on the edge of the park and in the middle of the park. Most, gazebo placed in the middle of the park because it will make the owner feel the atmosphere of the park with more intact. Noteworthy is that the gazebo was not built under a large tree or fruit trees. The reason, large or dense tree cover gazebo so the sun can be blocked and can cause mossy roof gazebo. Fruit trees can damage the gazebo for the fruit that fell on him.

Choosing The Right Furniture For Gazebo
To increase comfort, usually equipped with furniture gazebo supporters such as desks, storage cabinets, lamps, chairs and more. The location of the gazebo is located in open space and with an open hand, make gazebo building and furniture is in it should face the heat of the sun, pouring rain, air, comparisons and various other weather. Therefore, in order to remain durable, furniture that is in the gazebo furniture should be selected that are resistant to weather.

Supporting Elements
In order to look more beautiful gazebo and strengthen the overall beauty of the park, you can add some supporting elements. For example, by making the path to the gazebo, adding spotlights near the gazebo, or by adding some ornamental plants or flowers around the gazebo. Thus, the beauty of the garden can be more visible.
Gazebo will not only become a sweetener of a garden. More than that, the house has a garden function more comfortably and all occupants of the house can feel a familiarity with all other family members.


Similarly, a little review on how to build a comfortable gazebo at home, to review the other articles continue in homegardenhealthydesign see, may be useful and thank you.

Gazebo

Gazebo

Gazebo

Gazebo

Gazebo

Gazebo

Gazebo

Gazebo

Gazebo

Gazebo

Gazebo

Gazebo

Gazebo

Gazebo

Monday, January 16, 2012

Tips or How to Care Homes


Houses need to be treated because it is considered to express the soul owner. Starting from the interior of the house and some parts of the home such as yard, living room, floor and walls, even the bathroom, there clearly illustrated the nature of its inhabitants, whether they are diligent and regular home care.

There are 9 ways dream home care such as cleaning the crust in the bathroom, fix floor tiles cracked / loose, fix a wet or damp floors, repairing a leaking bathroom floor, painting the walls so as not easy to peel, when necessary to repainting, to nailing the wall so as not to crack, keeping doors and window frames to be free of termites, and eradicate the fungus at home.


1. Cleaning the crust in the bathroom

Bathroom floor can be removed crusty yellow-brown in the following way: crust rubbed repeatedly with pumice soap and water, then rinsed with clean water. Citroenzuur (citric acid) was sown on the outside and inside walls or foundation that has been soaked in the tub before, let the citric acid to react for one hour. Then, brushed and flushed with clean water and rinse until completely clean. Furthermore, dry with a dry cloth. Citric acid is often called citron-shaped white powder can be obtained in stores supplies cake.

2. Repair cracked floor tiles / off

Cracked ceramic floor removable ceramic carefully so that is still intact does not come apart. Nat scraped with a sharp object. After that the couple removed or broken floor to the bottom, made a sub-floor, then a replacement floor tiles installed.
If the damaged tile grout, grout cleaned first by scraping. Then grout flush with clean water. Furthermore, the gap is filled with grout rather liquid mixture and let soak until the inside. At the time the field was still half-dry, followed by a more viscous mixture and pressed so solid. Prior to the entry and drying, the remnants of filling material scattered on the surface of the floor wiped with a dry cloth.

3. Fixing a wet or damp floors.

Improvements on a wet or damp floor is actually quite easy from unknown causes. If the infiltration of water into the surface of the floor go through the grout, grout covered with waterproof material. If it happens on the floor that is not watertight, the entire floor is wet and humid is disassembled down to the bottom urugan sand. Above urugan sand is coated with a plastic sheet over it and then coated with a mixture of water-resistant species with a ratio of 1 cement: 2 sand 3 cm thick. The floor is ready to be installed again.

4. Fix a leaking bathroom floor.

Leaks in the bathroom in the house usually comes from tile grout. Grout is often eroded by water, cleaning chemicals, soaps, or how to install tile in bathrooms that are less precise. Must be known in advance whether the ceramic stick well on the floor by floor stepped on with little pressure or a knock. If it rang out means there is a gap or cavity is empty.

5. Paint the walls so as not easy to peel.

In order for a coat of paint on the walls is not easy to peel it plamur use should be limited only as cover cracks in the walls of fine hair. Often we make the mistake of using plamur as a primer layer. Plamur material is not made to bind the paint so that if it continues to be used in the process of painting, the paint will easily peel. When painting on the wall should be chosen carefully.
If the painting done on wet conditions, the paint will take longer to dry. Similarly, if a painting done on a very hot sun conditions, the results are less good. The results of painting on the outside (surface of the wall) will dry up earlier than the inside. This potentially causes the paint cracks, bubbles or peeling. The ideal time to do the painting is in dry conditions and not when the sun is very hot.

6. Repainted if the paint has started peeling.

Repainting should be done if we find the walls of the house was calcifying. The signs can we know with menyaapukan palms on the wall surface. If we get the former white powder means the walls need to be painted again.

7. How to nail the wall so as not to crack.

Often we nailed wall frames for pocket or household accessories, but we find dingding be cracked. This happened not because of a mixture of species that are less good but because we do not know how to nail the right wall. The trick is to give the tape cross on the wall before nailing the wall surface, and then nailed to crosses in the middle of the tape earlier. Once completed, the tape is released slowly as needed.
If the wall material is less qualified, so if nailed, the wall will fall. How to fix remedy is to pour two to three tablespoons of vinegar on the walls who want nailed. Wait until dry and then the wall can be nailed.

8. Keeping doors and window frames to be free from termites.

The trick with a 3:1 mix between diesel oil and then stir until blended. The mixture is applied evenly throughout the surface of wood and diesel oil until the mixture is completely dry. Once that was done painting on wood surfaces. Can also be painted before, wood surfaces coated with anti-fungal medication to prevent attacks from termites.

9. Eradicate the fungus at home.

To overcome the fungus that attacks parts of the house on walls and ceilings or even furniture, you can use vinegar, fungicides (fungus killers) or a liquid disinfectant. The trick, vinegar soaked rag, added to the parts attacked by fungus slowly so that mold spores do not fly everywhere. Sweeping was repeated with vinegar and a new cloth. Brush is not recommended to clean the mold because it will make the spores spread to other places, for example, attached to the furniture, sofa or inhaled by humans.
If the fungus attacks the long and quite heavy, for example on the ceiling caused by leaks, and leaks immediately repaired or replaced ceiling repainted. Installation of sanitation also needs to be protected from damage and leaks that are not the cause of the fungus.

Similarly, a little review on how to care of the house , to see the other articles continue in homegardenhealthydesign, may be useful and thank you.


Sunday, January 15, 2012

Ways / Tips To Overcome The Damp Walls


Damp walls of your home because of water seepage? these tips to overcome the moisture or seepage on the walls is complete.

To cope with the damp walls of a house or have water spots on interior wall which over time can grow mold on the walls, the first thing we should do is identify the location of damp or spotting is to be considered are:

• Is it because of a leaking water pipe.
• The surface of the ground water rises
• Seepage from the bathroom
• Hair Cracks
• The gap between two walls with neighbors
• Use of natural stone as an exterior wall coatings
• Or because the outer walls are not plastered.

Once we identify the problem cause then we just think the best solution to overcome the spots on the wall and if the house can be lost forever. Of identification then we get a method to overcome, namely as follows:

Water the soil surface rose & Water Pipe Leaks

Usually the humidity spots allocated under 1 meter on the wall of the house, and occurs continuously over time did not know when it rains or not. You should know that the ground water into the interior through the capillary wall material of cement. The main cause is due to poor quality of plastering materials, both outside and inside walls.
Solution: curry stucco approximately 1 meter from the surface, replace with new stucco with a composition of 3:1 sand and cement, and then do the painting in accordance with proper procedure.
The existence of a leaking water pipe, usually indicated as approximately 1 meter from the wall base. This is easily visible wet spots, worse than any other wet spots.
Solution: replace a leaking pipe, then plaster with the correct material composition.

Interior wall cracks

The main cause is due to the walls of your house there is a plaster-forming elements that are not clean and contain many soil or other materials, water used for mixing cement contains a lot of mud, carried out during the process plaster not time, yet perfectly dry plaster.
Solution: hair cracks slightly enlarged and covered with plamir wall, after the new total finishing perfectly dry.

The outside walls are not plastered

If your house walls plastered on the outside yet so often you come across your walls damp. Rain water into the material through the capillary walls seep through the pores of the material through the thickness of the wall ends on the interior walls, stop and form a pattern on a wall of water.
Solution: Plastering the outside wall with a ratio of 1:3 material, wait about 2 weeks to give the opportunity plaster dry completely, then plaster.

Water seeping from the crack walls

Water seeping in from the very walls of our homes are adjacent to neighboring resulting from water entering the second slit wall.
Solution: close the gap with a stucco coating and then coated with anti-leak.

Water seeping from the bathroom

The causes include:
• connection of water pipes damaged / broken
• quality of plastering materials that are less good.
Solution: quite easy, ie fix faulty connection / end, scrape plaster stucco and replace with the good.

Similarly, a little review on how to cope with damp walls, to see the other articles continue in homegardenhealthydesign, may be useful and thank you.

Damp on Walls

Damp on Walls


Damp on Walls

Damp on Walls

Damp on Walls

Damp on Walls

Damp on Walls

Damp on Walls